
Library Systems
With these settings, you can:
- Create a new library
- Manage big-picture configurations for your catalog
Library Systems settings govern the configuration for each catalog, such as the catalog URL, display name, eContent, menu links, and other features. These settings als determine which collections are owned, included, or discluded from the search results for the associated catalog. Individual library systems settings can be set for each of your branches.
Navigating Settings
Finding settings has never been easier!
Use the Search for a Propery feature at the top of Library Systems to locate specific settings.
Create A New Library System
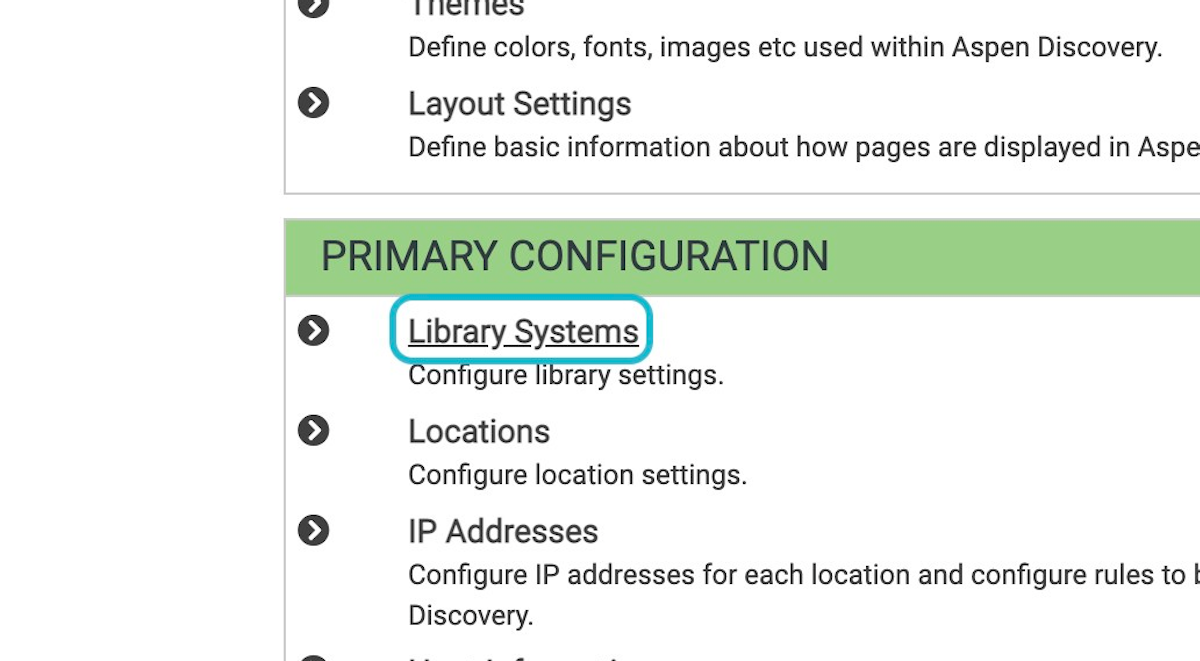
To create a New Library System, go to Aspen Administration > Primary Configuration > Library Systems:
-
To create a library system, click the Add New box.
-
If you have more than one system, you can click the small checkbox next to two and click 'Compare' at the bottom of the list to see the similarities and differences in configuration for the two.
-
You will want include subdomain and base URL in your options. This lets Aspen know which URL is specific to a system. This is especially important if you have many systems and subdomains.
-
If you fill in Display Name that will display within the header of Aspen if you click the box Show Display Name in Header.
-
If you click the box Consortial Interface it treats this Library system as part of a consortium, including other Library systems on the same Aspen installation. This setting assumes showing items from all locations and includes all libraries in the Owning Library and Owning Location search facets. Additionally, all owned location copies will show within a grouped works in search results.
-
The Create Search Interface checkbox controls whether or not the library has a scope created for it in Solr.
-
The Show in Select Interface (Requires the Create Search Interface) is whether or not the library will show in the Select Interface page. For libraries with multiple library systems and locations, a search interface is created at {YOURASPENURL}/MyAccount/SelectInterface
-
Systems Message allows you to add customized messages if you have an annoucement for your patrons. This message will display in the header of all Library Locations in this Library System. More granular system messages down to Library Location level, and also with time/date publishing controls can be configured under > Local Catalog Enrichment > System Messages. Read More About System Messages Here. We recommend you use the System Messages found in Local Catalog Enrichment instead.
-
The checkbox Generate Sitemap will allow pages within Aspen to be searchable on search engines like Google.
-
The dropdown for Basic Display allows you to reference which theme and layout settings to use for your system. The Home Link can contain a URL to an external website, if applicable. You can control where the home link is used within Layout Settings.
Copy An Exisitng Library System
You might want to do this is you are creating an additional library catalog (exp: Kid's Catalog). If you already have a Library System created that you would like to copy, go to Aspen Administration > Primary Configuration > Library Systems > click into the Library System you already have set up > click the Copy button at the top.
Aspen will pop up a list of things you are able to copy over to the new Library System. Select/deselect what you want. Your options may look different from the screenshot below depending on your current integrations/configurations.
Once you hit Continue, a new Library System will pop up with the name Copying {the name of the library you are copying}
There are recommendations along the top of suggested edits you should make including:
- Subdomain
- Display Name
- Base URL
- ILS Code
You will definitely want to scan the Library System settings and look for other things like theme, menu links, browse category groups and grouped work display settings if you want that to vary.
Also, you will want to check the Records to Include at the bottom.
Edit a Library System
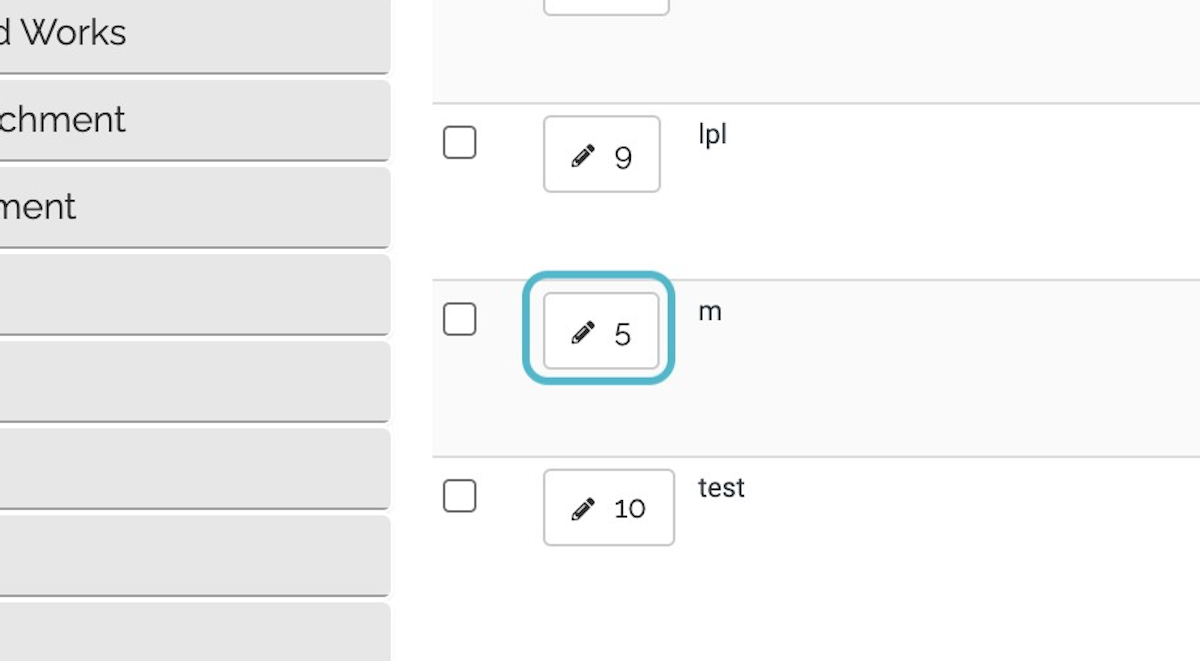
To edit existing system settings, you can either click the Edit button on the right hand side of the screen or click the Library ID.
Underneath the edit button the right-hand side, there is a History button. The history will display changes made in the configuration.
At the bottom of the screen, the Batch Update Selected and Batch Update All buttons allow you to make changes to multiple library system settings at once.
Updated 2023-01-13 - md bws
There a few different places where you might need to make changes to a location's name, depending on what you are trying to change.
Location Name in the Header
The location name displaying in the header comes from Primary Configuration > Library Systems > Display Name when Show Display Name in Header is checked.
Location Name in the /Select Interface
The location names from at https://{YOURASPENURL}/Select Interface can be removed by going to Primary Configuration > Library Systems > Show In Select Interface (requires Create Search Interface) and edited from Primary Configuration > Library Systems > Display Name
Location Name in Dropdown menus
The location names in dropdown hold menus can be changed in Primary Configuration > Locations > Display Name
Location Name in Library Hours & Locations
The location names in Library Hours & Locations can be changed in Primary Configuration > Locations > Display Name
Location Name in Copy Details
This information details come from ILS Integration > Translation Maps > Locations.
Location Name in Facets
This information details come from Primary Configuration > Library Systems > Locations. These are the ones you want to be careful changing, specifically in relation to any browse categories that may be using that facet location (exp: Available now at Main Library).
Changing these fields takes an overnight indexing process so you might want to make these changes late in the day.
Any browse categories using these locations in the facet limiters can potentially break and need to be recreated.
The settings at the top are using configured by your Implementation Specialist for you during the implementation process.
Subdomain - This typically matches to part of your Base URL but really has to do with making sure the correct URL resolves on the server. We typically don't recommend making changes to these settings without contacting a member of our Systems Team.
Base URL - The URL of your Aspen Discovery catalog. You may see an aspendiscovery.org URL or your custom URL defined here. If you do want to switch from an aspendiscovery.org URL, changing the Base URL does not automatically do that. You'll have to reach out to a member of our System's team in order to configure the file on the server as well. We typically don't recommend making changes to these settings without contacting a member of our Systems Team.
Display Name - This is the name of the Library System that will display in Select Interface and also if you check Show Display Name in Header.
Account Profile Id - Should be ILS
Show Display Name in Header - This can be checked if you have a smaller logo without the name of your library and/or you automatically want Aspen to display the name of your library in the Header.
Consortial Interface? - This would be checked typically on main instance of a consortial site or a Kid's catalog, where a catalog exists but that instance is pulling owned items from other locations and doesn't own things itself. This will help properly display status of items.
Create Search Interface - This should be checked for any physical locations but not things like Lockers or Drive Up Windows
Show In Select Interface (requires Create Search Interface) - This Library System will show at {YOURASPENURL}/MyAccount/SelectInterface This is a menu commonly used for consortium who have multiple catalogs/library systems on one server. If a library system should not show on this directory, make sure this box is unchecked.
Generate Sitemap - This helps Google index your server and for performance reasons, should typically only be checked on the 'main' instance of Aspen if you have multiple Library Systems.
Basic Display
To add your website URL, go to Primary Configuration > Library Systems > click into Library System you want to edit > Basic Display > Home Link and enter your library website URL.
Once the URL is added, a Library Home Page link will be automatically generated in the hamburger/side menu.
You also have some additional options of where this URL might appear in your catalog in your Theme & Layout > Layout Settings. Click here for more information.
2023-01-18 km bws
By default, Aspen shows a button in the top-right corner labeled "Languages" or "Languages & Display." This button allows users to switch the interface to a different language and/or switch themes (if multiple themes have been set up for a catalog).
This button in the header can be toggled on or off with the setting: Show Language and Display Settings in Page Header.
If this button is toggled off, the language and display options will always still show in the dropdown menu on the right-hand side of the interface above the search bar.
Contact Links
In Aspen Administration > Primary Configuration > Library Systems > Contact Links you can input the appropriate links for social media pages.
When you input a link, the social media icon will appear at the bottom right of your Aspen page in the footer.
The icons are clickable and redirect patrons to those pages.
Social Media Links Available:
- YouTube
ILS/Account Integration
The settings in Aspen Administration > Primary Configuration > Library Systems > ILS/Account Integration are how your ILS interacts with Aspen Discovery.
- ILS Code - The location code for this system.
- Workstation ID (Polaris only) - Optional workstation ID for transactions. If different than main workstation ID, set for the account profile.
- Show Card Expiration Date - Whether or not the user should be shown their card's expiration date in the My Library Card page of their account. Enabled by default.
- Show Expiration Warnings - This will warn users when their accounts are set to expire soon. Enabled by default.
- Expiration Near Message - A custom message to show when the user's account will expire soon (if the above option is checked) starting 30 days prior to expiration.
- Expired Message - A custom message to show when the user's account is expired.
- Show While You Wait - Allows Aspen to give users recommendations on items when placing holds. Enabled by default. Learn More About While You Wait.
- Show Messaging Settings (Koha/Symphony only) - Whether or not the user should be able to see their messaging preferences in their account. Learn More About Message Settings.
- Allow Linked Accounts - Enables users to link multiple library accounts under a single Aspen account. This setting exists independently of any guarantor and guarantee settings in your ILS, if applicable. Enabled by default. Learn More About Linked Accounts.
- Show Library Hours Notice on Account Pages - Determines whether or not the library hours should show on the checkouts and holds pages within the user account. Enabled by default. Learn More About Library Hours & Locations.
- Display Item Barcodes in Patron Accounts - Whether or not users can see item barcodes for materials they have checked out.
- Display if patron checkouts have holds on them (Koha only) - Whether or not users can see if checked out items have holds on them.
- Always display the number of renewals on a checkout - Whether or not users can see how many renewals have been used, example: Renewed 1 of 5 times.
- Enable Reading History - Whether or not users can turn on their reading history. Enabled by default. Learn more about Reading History here.
- Opting in to Reading History Updates ILS settings (CarlX/Koha/Millennium/Sierra/Symphony Only) - Whether or not the user should be opted in to reading history within the ILS when they opt in within Aspen.
- Opting out of Reading History Updates ILS settings (CarlX/Koha/Millennium/Sierra/Symphony Only) - Whether or not the user should be opted out of reading history within the ILS when they opt out within Aspen.
- Enable Saved Searches - If users can save searches within Aspen. Enabled by default. Learn more about Saved Searches.
- Show Circulation Modules to Users in My Account - Whether or not users can see Checkouts, Holds, Fines and Library Card in My Account. Enabled by default.
- Show Contact Information to Users in My Account - Whether or not users can see their Contact Information in My Account. Enabled by default.
- Show Preferences to Users in My Account - Whether or not users can see their Preferences in My Account. Enabled by default.
These additional settings will show on Non-Koha servers:
- Show Work Phone in Profile - Whether or not patrons can change a work or secondary number in their account
- Show Notice Type in Profile - Whether or not patrons can change the way they receive notices in their account (Applies to Polaris Only)
- Add SMS Indicator to Primary Phone - Whether or not to add ### TEXT ONLY to the user's primary phone number when they opt in to SMS notices.
- Maximum Fine Amount to Allow Account Updates - The maximum amount that a patron can owe and still update their account. Any value <= 0 will disable this functionality.
Barcode
In Aspen Administration > Primary Configuration > Library Systems > ILS/Account Integration > Barcode:
- Selecting a Library Barcode Style will allow Aspen to generate a scannable barcode within the user account (both in Discovery and the LiDA app). In order to scan these barcodes from a mobile device, you will need a 2D scanner able to scan reflective surfaces.
- Enter a minimum and maximum barcode length, if desired.
- If you define a Barcode Prefix, patrons will be able to log into Aspen with the unique digits at the end of the library card number instead of having to enter in the entire card number. If you define a barcode prefix, be sure to enter in the min and max barcode length as well.
Updated 2023-01-13 - md bws
Alternate Library Card
Currently, this functionality is not in use.
This is where you define how you would like patron names to be displayed.
Choose Patron Display Name Style:
- First Initial. Last Name or
- First Name. Last Initial
Select Which Options You Want Your Users to Have:
- Allow Profile Updates - Whether or not a user can update their profile
- Allow Patrons to Update Their Username - Whether or not a user can add a username. This is typically used so that a user can log in with a different login than their library card barcode
- Allow Patrons to Update Their Name (Koha only) - This would allow a user to update their first and last name in Aspen > My Account settings
- Allow Patrons to Update Their Date of Birth (Koha only) - This would allow a user to update their date of birth in Aspen > My Account settings
- Allow Patrons to Update Their Address - This would allow a user to update their address in Aspen > My Account settings
- Allow Patrons to Update Their Phone Number - This would allow a user to update their phone number Aspen > My Account settings
- Allow Patrons to Update Their Home Library - This would allow a user to update their home library if they have an option to choose from multiple libraries.
- Use All Caps When Updating Profile - This would be if the user's changes will be submitted in all caps.
- Require Numeric Phone Numbers When Updating Profile - This would be if all numeric digits are required to update a phone number, so no dashes or parathesis.
- Bypass Review Queue Updating Profile (Koha Only) - Whether or not the Koha review queue for patron modifications is bypassed when updates are submitted. This means that a staff member will have to approve the changes in Koha. This is all or nothing for changes.
- Note: Changes to the Home Library field will not go through the Koha review queue.
- Allow Patrons to Update their Alternate Libraries - Allow Patrons to See and Change Alternate Library Settings in the Catalog Options Tab in their profile.
- Show Work Phone in Profile - Whether or not patrons can change a work or secondary number in their account
- Show Notice Type in Profile - Whether or not patrons can change the way they receive notices in their account
- City/State Field (Symphony Only) - Can choose if Aspen is using a combined City/State field or City and State fields
- Add SMS Indicator to Primary Phone - Whether or not to add ### TEXT ONLY to the user's primary phone number when they opt in to SMS notices.
- Maximum Fine Amount to Allow Account Updates - The maximum amount that a patron can owe and still update their account. Any value <= 0 will disable this functionality.
See More Information About Account Settings
In Aspen Administration > Primary Configuration > Library Systems > ILS/Account Integration > PIN/Password you can select Allow PIN Reset. This will allow users to change their PIN/password once they are logged in.
Note: This functionality is only available for CarlX, Koha, Polaris, Sierra, and Symphony
Once this setting is checked, users will see a Reset PIN/Password option, where they must enter their old PIN/password and create a new one.
From here, you also have a few other options:
- Set a Minimum and Maximum PIN Length
- Choose to only allow numeric digits in the PIN
If you have specifications set in Aspen about the length of the password and/or if it can only contain numeric digits, a message will show above the PIN/password fields.
In Aspen Administration > Primary Configuration > Library Systems > ILS/Account Integration > Holds you can customize what information is displayed in regard to holds.
- Show Hold Button - Allow Holds to be placed in Aspen
- Show Hold Button within the search results - Whether or not the hold button is displayed within the search results so patrons can place holds on items
- Show Hold Button for items that are checked out only - If enabled, this will only show a Hold button if the item is checked out and not for items that are available on the shelf.
- Allow Patrons to Update Their Pickup Location - If enabled, users will be able to update their hold pickup location in their account if you have multiple hold location options.
- Allow Patrons to remember their preferred pickup location - If enabled, users can choose to select a preferred pickup location that Aspen will remember for the next time the user places a hold.
- Show Cancellation Date - Whether or not the patron should be able to set a cancellation date (not needed after date) when placing holds. When this is enabled, a calendar will pop up when placing the hold.
- Show Log Me Out After Placing Holds - If enabled, Log me out after requesting the item will show up on the hold screen.
- Treat holds for formats that allow either bib or item holds as -
- Choose from Either Bib or Item Level Hold, Force Bib Level Hold, or Force Item Level Hold
- Show volumes with local copies first when placing holds - When local copies are available of volumes, those will display first when placing a hold.
- Allow Changing Pickup Location For Available Holds (Polaris only) - If checked, once holds are on the hold shelf for the patron, they will still be able to change their pickup location.
- Allow Cancelling Available Holds (Polaris only) - If checked, patrons will be able to cancel holds waiting for them on the hold shelf.
- Allow Cancelling In Transit Holds (CarlX only) - If checked, patrons will be able to cancel holds with an in transit status.
- Allow Freezing Holds - If enabled, users will be able to freeze their holds
- Max Days to Freeze Holds - If Allow Freezing Holds is enabled, you can set the maximum amount in the days in the future that you want to allow users to freeze their holds.
- Default Not Needed After Days - Libraries can choose to set the default number of days that an item is no longer needed. Use -1 for no default. Many libraries will use 365 for 1 year.
- In System Pickups Only - Restrict pickup locations to only locations within this library system
- Valid Pickup Library Systems - Additional Library Systems that can be used as pickup locations if the In System Pickups Only is on. List the libraries' subdomains separated by pipes |
- Hold Disclaimer - A disclaimer to display to patrons when they are placing a hold on items letting them know that their information may be available to other libraries. Leave blank to not show a disclaimer.
- Delay showing holds available for # of days - Delay showing holds as a available for a specific number of days to account for holds shelving time.
Symphony Only Settings
- Hold Placed At - Select from Use Active Library Catalog, Use Patron Home Library, or Use Pickup Location
- System Hold Note - A note to automatically add when placing a hold
- System Hold Note Masquerade - A note to automatically add when placing a hold when a librarian is Masquerading and places a hold
Learn More Information About Holds
In Aspen Administration > Primary Configuration > Library Systems > ILS/Account Integration > Login:
- Show Login Button - Will need to be checked to allow users to login
- Prevent Login for Patrons of this Library - This will prevent login for users from logging in
- Check "Remember Me" by default when outside the library - When a user is accessing Aspen away from one of the Library Locations (determined by the IP Address settings), the user will have an option to remember their login and password.
- Login Form Password - Will display for the user login with whatever is put in this box. Typically: PIN, Password, or PIN/Password
- Login Notes - Add a custom message to the login screen. This could be a hint or reminder to help patrons login.
- Allow Login to Patrons of this Library Only - This will prevent users of other libraries that share your Aspen server from logging in to this library system.
- Message for Patrons of Other Libraries - Add a custom message for patrons of other libraries that are not able to login. This may be instructions or a link to redirect users to the other site to login.
Another message that might appear in the login box is "Don't have a library card? Register for a new Library Card." This message will appear if Self Registration is enabled in Aspen Administration > Primary Configuration > Library Systems > ILS/Account Integration > Self Registration
Messages (For Koha Only)
In Aspen Administration > Primary Configuration > Library Systems > edit the setting > ILS/Account Integration > Messages:
- Show OPAC Notes - In Koha (user account), scroll to "OPAC Note" under Library Setup after clicking Edit on user profile
- Show Borrower Notes - In Koha (user account), click "Add Message," then select "OPAC"
- Show Debarment Notes - In Koha, in the tab at bottom of the user profile, click "Add Manual Restriction"
- If Debarment Notes is on in Aspen, it will still show a generic message, but not the specific comment from Koha.
- The generic message is: "Please note: Your account has been frozen. Usually the reason for freezing an account is overdues or damage fees. If your account shows to be clear, please contact the library." Usually this appears when items are long overdue/lost.
Where the Notes Display in Koha:
Where the Notes display in Aspen:
To enable Self Registration, go to Aspen Administration > Primary Configuration > Library Systems > ILS/Account Integration > Self Registration.
In order to enable self registration, change the selection from No Self Registration to either ILS Based Self Registration or Redirect to Self Registration URL.
ILS Based Self Registration currently works with the following ILSes: Koha, Polaris, Symphony, Horizon, and Carl.X. Sierra also works with screen-scraping. Click here to learn how to enable and set up self registration in Koha.
If you have Quipu eCard set up in Aspen Administration > Third Party Enrichment > Quipu eCARD Settings, there will also be an option for Quipu eCard in the self registration dropdown.
The default path for the Self Registration page is: {YourAspenURL}/MyAccount/SelfReg
Third Party Registration requires that an external vendor, such as an econtent vendor, has integrated with Aspen's APIs to provide patron registration from their service.
At this time, the Aspen team is working with exernal vendors to support these features and we will update this documentation when that work is ready for Aspen partners to use.
Fines/e-commerce
Searching
Coming Soon
Combined Results
Combined Results is a bento-box or summary type search of certain areas of Aspen.
Combined Results can pull from:
- Catalog Results - Results from your Library Catalog
- DP.LA - Results from the Digital Public Library of America integration. Learn More.
- EBSCOhost - Results from the EBSCOhost integration. Learn More.
- Events - Results from your Communico, LibCal or Library Market calendar integration. Learn More.
- Genealogy - Results from your genealogy records. Learn More.
- Open Archives - Results from your open archives integration. Learn More.
- Website Search - Results from pages indexed from your website or Web Builder pages.
- User Lists - Results from your public staff and New York Times lists.
Combined Results is a great way for patrons to get an idea of what the library has to offer across all integrations.
Click on Aspen Administration > Primary Configuration > Library Systems
Select your Library System.
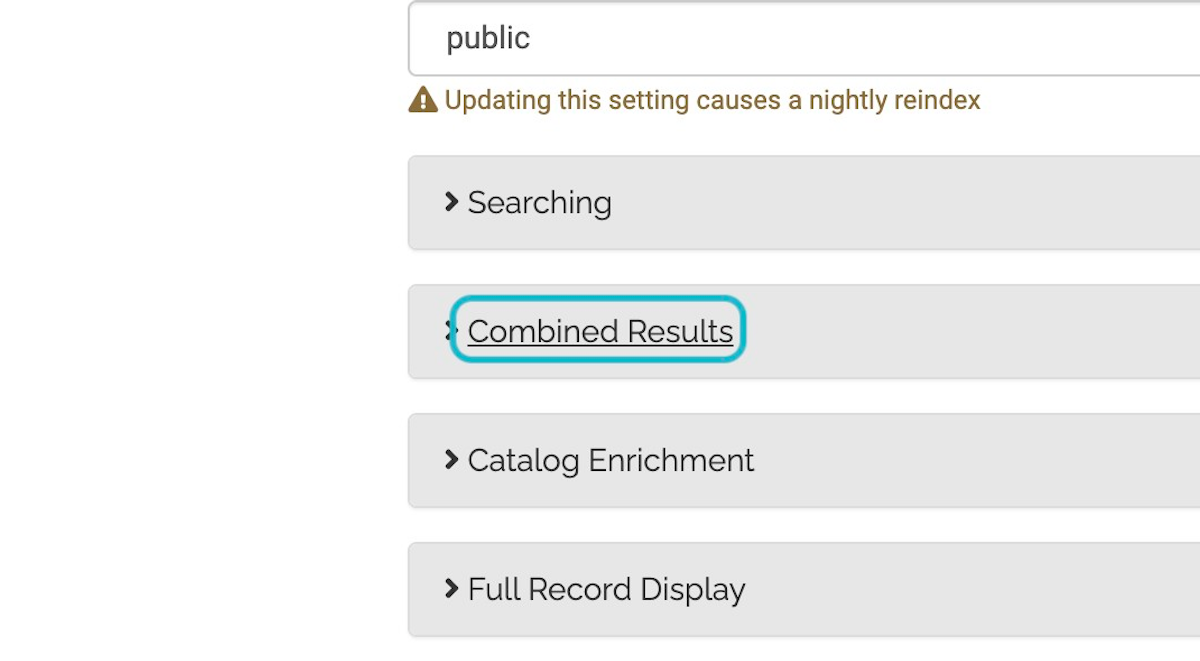
Scroll down and expand the Combined Results section.
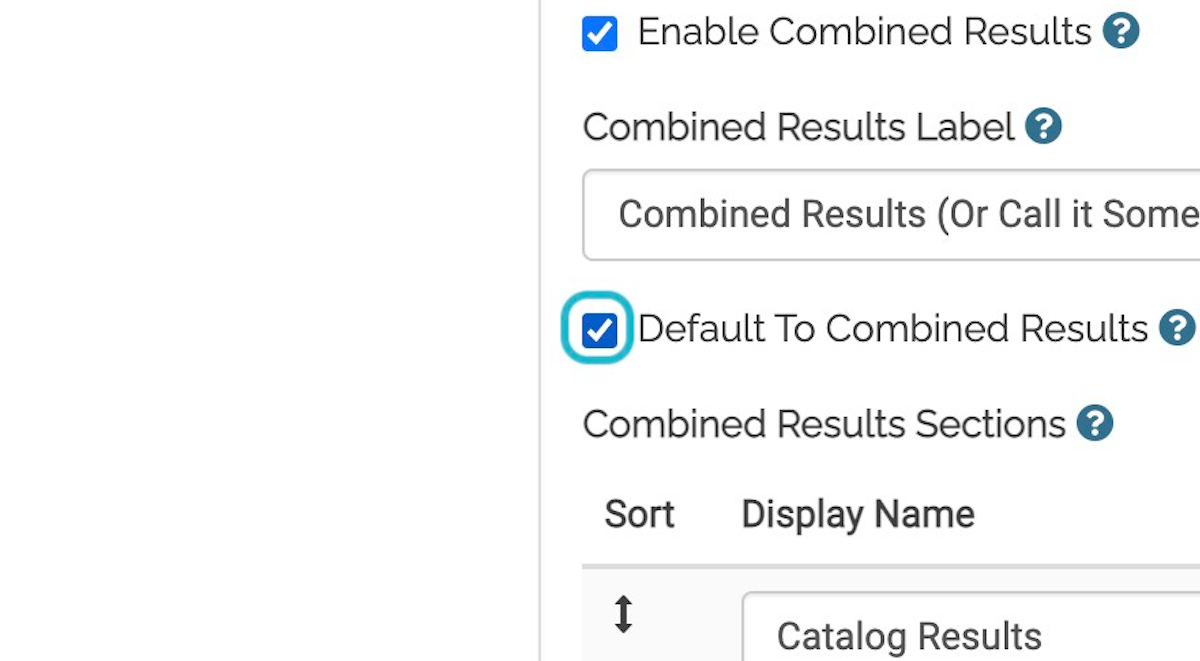
Check Enable Combined Results to turn Combined Results on
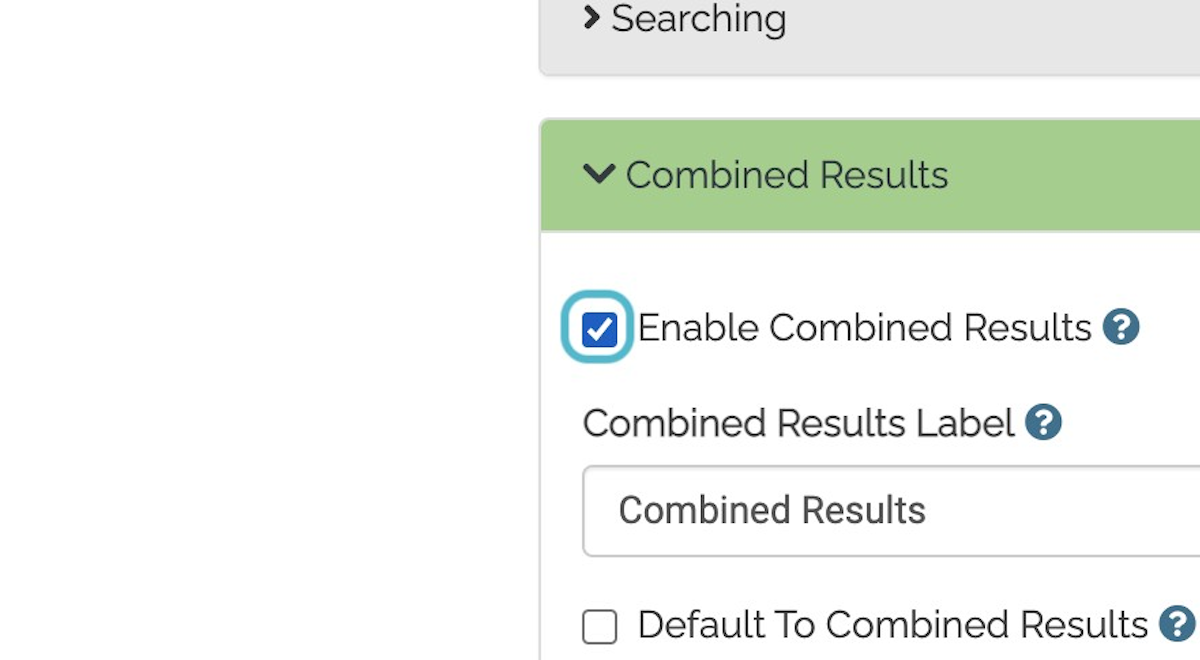
In Combined Results Label you can change the name of Combined Results to something else.
Clicking on Default to Combined Results will set Combined Results as the default search for your library catalog instead of "in Catalog". This is generally not recommended, but we do have a few research libraries that have opted for this display.
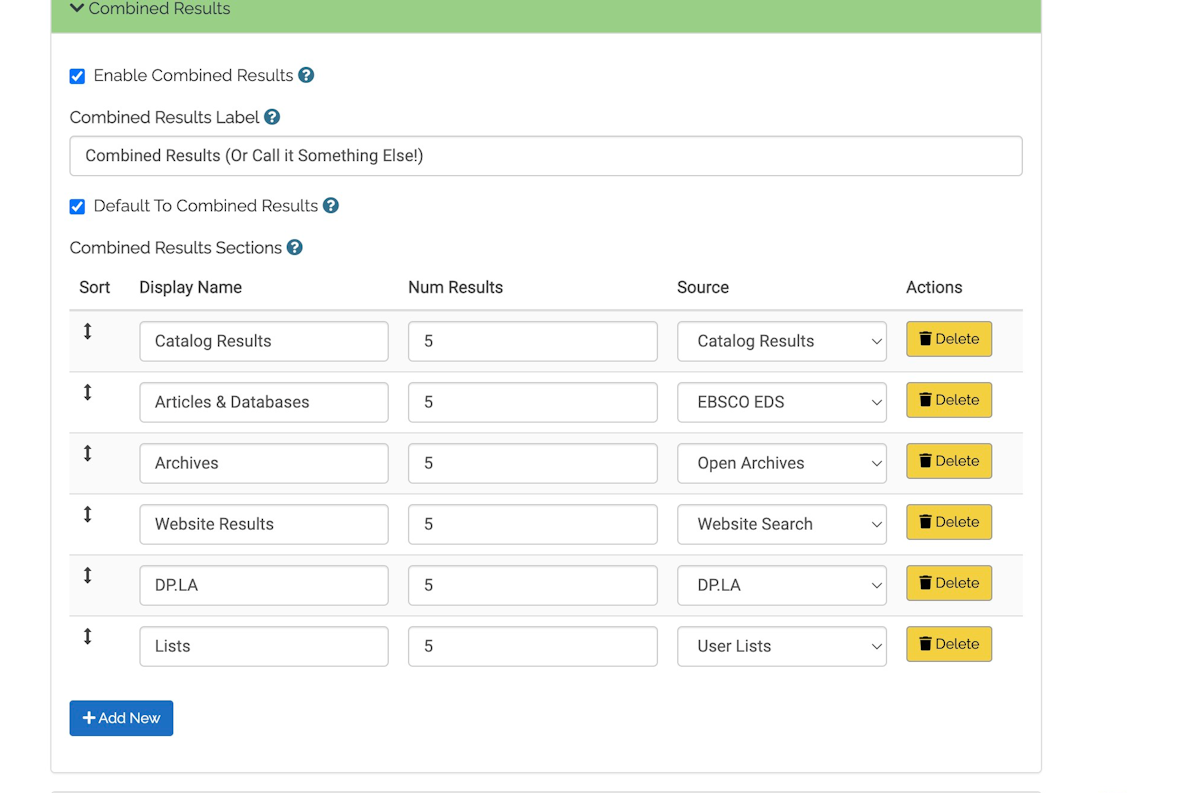
Click on Add New to start creating fields.
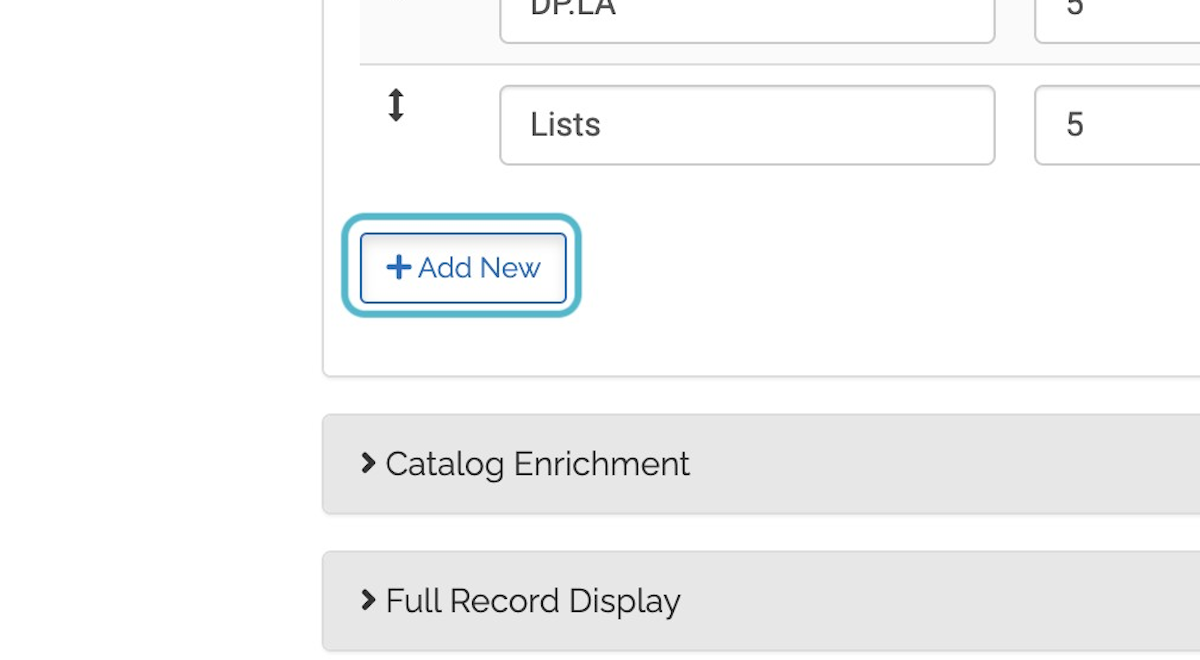
Set a Display Name, Num of Results, and the Source for each section. This will create your Combined Results page.
Num Results is how many results will show to the user before having to click on "Full Results" and/or "See All Results". Simply click and drag the sections to reorder how the sections will display on the Combined Results page.
Once you save, you will see in Combined Results in your dropdown search type.
Perform a search to make sure your Combined Search is set up how you would like.
Catalog Enrichment
Check Enable User Lists to allow patrons and staff to create lists in Aspen. This is turned on by default.
Check Enable List Descriptions & Notes to allow patron and staff to add descriptions and notes to lists. This is turned on by default.
Allowable List Names - This would be used in rare cases like prison or school libraries where you do not allow staff and patrons to create their own list names. If you have a situation where you want to limit the names used for lists, you would fill in the allowable lists names here. This is off by default. Exp: My Favorites|To Check Out|My List
Enable Option to Import Lists From Old Catalog - This would be checked if you are able to pull in user lists from your ILS into Aspen. This would be enabled when migrating to Aspen so that users can pull their lists into Aspen. This can be enabled for Koha, Polaris and Sierra libraries.
When enabled, an Import from Old Catalog button will appear in Your Account > Your Lists. When clicked, lists stored in the ILS will load.
Show Citation Style Guides - Checking this setting enables the Generates Citations button to show within lists.
Aspen has the following citation options:
- APA
- Chicago/Turabian - Humanities
- Chicago/Turabian - Author Date
- MLA
Show Wikipedia Content is checked by default. This enables the Wikipedia integration.
Full Record Display
Show Email This - By checking this box, patrons will be able to email records and lists. This is turned on by default.
Show Sharing To External Sites - By checking this box, patrons will be able to share records, lists and events (if using Events integration) via Twitter/X, Facebook and Pinterest. This is turned on by default and the social media options cannot be customized so this is all or nothing.
Holdings Summary
All of the Holdings Summary options are enabled by default.
Show It's Here - By checking this box, if you are using IP address location settings, then the status of available items will automatically change from On Shelf to It's Here.
Show Hold and Copy Counts and Show on Order Counts relate to if these respective counts show in the grouped work display.
How On Order Items show when neither Show Hold and Copy Counts and Show on Order Counts are checked
How Checked Out items with holds lists show when neither Show Hold and Copy Counts and Show on Order Counts are checked
How On Order items show when only Show Hold and Copy Counts is checked:
How Checked Out items with holds lists show when only Show Hold and Copy Counts is checked:
How On Order Items show when both Show Hold and Copy Counts and Show on Order Counts are checked
How Checked Out items with holds lists show when both Show Hold and Copy Counts and Show on Order Counts are checked
Note: For certain ILSes, Aspen will need an export of active holds by bib. record in order to show these counts.
Materials Request
Course Reserves
Interlibrary Loans
Data Protection Regulations
Information coming soon
Settings Defined: Messaging through DPLA
Messaging
Twilio Settings - If you have Twilio enabled, you will see the scope name that corresponds with this library system here. Learn more about Twilio.
Boundless
Boudless Scope - If you have Bounless enabled, you will see the scope name that corresponds with this library system here. Learn more about Boundless.
CloudLibrary
CloudLibrary Scopes - If you have CloudLibary enabled, you can technically click Add New and add a corresponding scope to the library system. Currently, the attached scope does not display when saved. For that reason, it is better to define scopes in CloudLibrary > Scopes and ignore these settings. Learn more about CloudLibrary.
OverDrive
OverDrive Scope -
Genealogy
Enable Genealogy Functionality - If enabled, this will turn on the Genealogy module for this library system. Learn more about Genealogy here.
Open Archives Results
Allow Searching Open Archives - Check this after you set up your Open Archives integration. This will enable the in History & Archives search dropdown. Learn more about Open Archives here.
Web Builder Results
Allow searching locally created web content - Check this after you set up Web Builder pages and Web Resources. This will allow Aspen to index your content and create a seperate search interface. This will enable the in Library Website search dropdown. Learn more about Web Builder here.
EBSCO
EBSCO Settings -
EBSCOhost -
DPLA
Include DPLA content in search results - If enabled, this will display Digital Public Library of America content at the bottom of search results. Learn more about DPLA.
Holidays
In Primary Configuration > Library Systems > scroll toward the bottom to Holidays
Holidays
By adding holiday closures in the Holidays section, when your library is closed (based on these added holidays), this information will appear on pages in the user account (Checked Out Titles and Titles On Hold).
Note: Holiday information will not display in the Hours & Locations information.
Note: These aren't for regular closures (exp: we close every Sunday); those can be adding in Locations > Hours chart instead.
Koha ILS:
If you have specified holidays within the Calendar tool in Koha, Aspen will automatically pull your holiday closings into this section. Any changes will need to be made from Koha administration. Attempts to change this information from within Aspen will be overridden by whatever you have set in Koha. These changes from Koha will show in Aspen after the indexer so you can expect holidays to show between 5-15 minutes.
Other ILS:
Holiday closings will need to be manually added in this section. Click Add New, select the date, and enter in the name of the holiday/reason for closing.
Another great way to advertise holiday or other closures, is through System Messages.
Records to Include
Go to Aspen Administration > Primary Configuration > Library Systems > scroll all the way to the bottom. There are also scoping options in Aspen Administration > Primary Configuration > Locations > scroll all the way to the bottom.
Records Owned - Tells Aspen what items are owned by your system. If you are a one branch system, you can input .* as your location, which tells Aspen all items from all of the locations in this Library System are owned by this Library System. If you are a multi-branch system then you will need to define your distinct locations in the locations section under Primary Configuration. You can also use this section to exclude specific locations or sub-locations from the System's 'records owned'.
Records to Include - Tells Aspen what records should be included in your searches. Again .* can be used in the 'Locations' box to include all locations that are associated with this Library system. Alternatively each location can be added as a line and its location code used in the 'locations' box. Against each line there are further options to include and excluded different item types, audiences, formats, items on order etc.
Include Library Records to Include - In Aspen Administration > Primary Configuration > Locations there is an option to check a box Include Library Records to Include. This means that in addition to what's included in this Location's settings, to also include whatever is specified to be included in the Library System settings. Or, you can read it as, Include "Records to Include" from Library Systems settings. You'll also want to check this box if libraries are using IP detection and applying any special Library Systems Settings to the Location. This makes setup easier since you don't have to copy everything from the Library System settings to each Location.
Note: For values like Audience, Collection and Shelf Location, you will need to use the Translated Values, not the codes. Exp: Fiction instead of FIC
If you have side loads set up, this is where you will see the scopes that correspond to this library system. Learn more about side loads here.
